If you like to get yourself and your GoPro wet you’ve arrived at the right destination.
No, I’m not holding a pool party, but I will give you the best tips for making the most out of your underwater GoPro shots.
For most people, filming underwater is the main reason for buying a GoPro. So why not make the most out of it?
I remember when I took my first underwater shoot with a GoPro. Man, I was so disappointed by the way it looked.
I initially thought that there’s something wrong with my camera, or it’s a fake one. The video looked so dull and washy. It was nothing like I expected.
You see these amazing GoPro underwater shots on YouTube, so you have really high expectations from your own shots.
But when you get back home and are all excited to see the video….you realize that simply hitting the shutter button doesn’t work. Not that a GoPro has that many buttons anyway.
Oh, and did I tell you that we are editing videos for clients such as yourself?
Alright, enough with the chatter, let’s get to the tips.
The preparation for a successful underwater shoot actually starts before you actually dive in. Getting a few things in check will make your life so much easier underwater.
#1 Clean your GoPro housing and lenses
First and foremost you want to make sure your lenses are housing are super clean.
So, remove any dirt that might be left from last week’s mountain biking race before packing for your diving adventure. There’s nothing worse than having dirt stuck between your housing and the lenses while you are 50m below the surface.
I like to clean everything even if there are no visible droplets or there’s no visible dirt just to make extra sure. It doesn’t hurt to take a photo of white/black background to check if everything is super clean afterward. Yeah, I know, I’m a bit OCD about it.

#2 Use Hydrophobic Filters
Sometimes cleaning the lens is not enough. The white stains caused by the drying of salt droplets are hard to remove.
Plus, seeing on the small screen, these stains are hard to notice. If the salt stains are present and you don’t clean them properly, on larger screens, those stains would be quite evident and hard to miss.
An excellent idea to avoid dried water droplets on the lens is to use hydrophobic filters. With the filter in place, the water will easily roll-off.
The latest GoPro model – Hero 10 – comes with the hydrophobic filter applied. It would be a good idea to use the filters for older models. Once applied the filter will last for weeks, sometimes even months.
Newer models (Hero 11, Hero 12, and newer) feature improved lens coatings, but external hydrophobic filters are still strongly recommended, especially for saltwater use. They reduce water spotting and make post-production cleanup easier.
#3 Make sure the housing doesn’t leak
Once you’re done cleaning it’s time to double-check the housing and make sure it’s not taking in any water.
An easy way to do this is by visually inspecting the white rubber seal around the waterproof door of the housing. Make sure it is in perfect condition and it’s clean otherwise, it can cause leaking.
You can test if your housing is leaking or not by taking out the camera, closing the waterproof door, and putting it underwater. Give it a good shake and then check for any water drops inside the housing.
The GoPro Hero 9 and the Hero 10 are both waterproof, up to 10 feet without using any casing, so one or two drops of water will probably not cause any damage. But why risk it?
This still applies to all modern GoPro models. However, micro-leaks caused by sand or hair remain the #1 cause of water damage, so housing inspection is still critical.
#4 Use Screen Lock
Sometimes changing settings above water can be tricky. While a few droplets on the screen won’t be a problem, making setting changes that you want when the screen is damp can be an issue at times.
It’s prudent to decide the settings well before you even get wet.
That’s because it’s better to lock the screen to prevent the camera from registering a droplet or water splash on the screen as a touch.
The chance of something like happening is quite remote. But, why play the odds.
#5 What settings to use
When you’re underwater or in the water you don’t really have the time or mood to play around with the settings. So make sure to set the resolution, frame rate, or shooting mode beforehand.
For underwater video using 1080p at 60 fps on a GoPro Hero 10 will give you the best results.
If you are using the newer GoPro Hero 6 you can crank up the resolution and frame rate to either 2.7k at 120 fps or even 4k at 60 fps. Apparently, using a higher resolution will make the footage less shaky.
On top of that, you can always go from a higher to a lower resolution in post-production. Or you can take the 4k footage and zoom in until you get to 1080p. That is one easy way to zoom in without losing the quality.
When it comes to frame rate, if the light is not very good, you might want to settle with a slower shutter speed such as 30 fps or 60 fps.
This way the image will be brighter and less noisy. Yeah, you won’t be able to edit the videos into that buttery smooth slow motion, but you will get a better quality video.
For photographs you can use the Time Lapse feature, setting the highest resolution, and take 1 shot every half a second.

Higher resolutions such as 5.3K and 4K are now common on newer models. However, 1080p–4K at 30–60fps remains the most reliable choice underwater, especially in low light.
#6 Certain Settings Don’t Work Underwater
The latest models (including GoPro Hero 9 and Hero 10) prevent users from changing some features underwater.
Features such as frame rates, resolution, and Protune can’t be tweaked, whereas users are free to switch between photo and video modes.
In addition, GPS and wireless controls, which are useless underwater, can’t be tweaked.
This restriction still applies to current GoPro models. Resolution, frame rate, Protune settings, GPS, and wireless features remain locked underwater.
#7 No fog, please
Getting fog or moisture on your GoPro lenses will totally ruin your shoots. This is a common issue when you are using your GoPro in the water, but you can fix it pretty easily.
One way is to simply let your camera sit for a bit before you start filming. That way it will get closer to the temperature of the environment you are filming in and there will be less or no fog on the lenses.
Another solution that works really well is to place some anti-fog inserts inside the housing. You can make these yourself using some paper towels.
Or, if you are not so much of a DIY guy or gal you can buy them in packs of 20 for around 5 bucks. You can also reuse them, so that’s a pretty good deal.
#8 Turn Off WiFi
WiFi normally doesn’t work underwater. With some extra effort, using a WiFi extension cable, it’s possible to transmit the signal to a device above water.
This is especially useful if you want to live stream your underwater adventure. In the absence of special circumstances, it’s wise to turn off the WiFi before entering the water.
That is because even though WiFi doesn’t work underwater, the feature can drain the battery, which will reduce the time you can film in water.
Even with newer wireless standards, WiFi and Bluetooth still do not function underwater and will drain battery if left on.
#9 Use a red filter or magenta filter
Water absorbs red light first, causing footage to look blue or green.
- Use red filters in blue water
- Use magenta filters in green water
You know how everything looks either blue or green underwater, right? That’s mainly because there’s very little no red color underwater.
For this reason, underwater shoots will look very blue or green and will look washy. When the camera can’t see any red color it will have a hard time adjusting its internal/auto settings and it will make everything look pretty bad.
Using a red filter will compensate that everything will look so much better and natural. Red filters work great for blue waters. There’s also a magenta filter which works really well for waters that are green.
These filters will make a huge difference in the quality of the shoots so I can’t stress enough how important they are for underwater photography or videography.
The newer GoPro Hero 10 performs so much better than the previous version – the Hero 9 – even without any filters, but when you add the right filter, that when your shots will really start to come to life and really pop.
You can get a pack that contains both colors – red and magenta – as well as different intensities to use for shallow or deeper waters.
Newer GoPros have improved color science, but red and magenta filters are still essential below ~3–5 meters for natural-looking footage.
Speaking of deep waters…

#10 Lock the Orientation
The water is a tricky place to film; somewhat similar to space. It’ll be a real challenge to steadily hold the camera the way you want.
Sure, there are accessories that can improve the balance. But there is something you can do even if you don’t have a double handle tray.
You can turn on ‘automatic rotation’ so that the camera stays vertical/horizontal even when you change positions.
That said if you don’t mind extra work during the post-production stage then lock the orientation and do the necessary changes later.
#11 How deep can I go
The GoPro is waterproof up to the depth that the casing is rated for, so that’s how deep you can go without risking any damage to the camera.
GoPro cameras are waterproof. Hence even without any special housing, users can take their GoPro Hero 10 to a depth of 10 meters (33 feet).
If you are into scuba diving though, that’s probably not going to be enough. So you will have to use a housing which is rated for deeper waters. Super Housing is a great pick for scuba diving.
If you go deeper than 33 feet though (which is not that deep) you will need to use additional lights. There will be less sunlight reaching that deep, so your shoots will look grainy.
This depth rating remains unchanged for modern GoPros. Protective housings are still required for scuba diving.
Waterproof Depth Ratings
| GoPro Model | Waterproof Only (Without Protective Housing) | With Protective Housing |
|---|---|---|
| HERO13 Black | 10 meters (33 feet) | 60 meters (196 feet) |
| HERO12 Black | 10 meters (33 feet) | 60 meters (196 feet) |
| HERO11 Black | 10 meters (33 feet) | 60 meters (196 feet) |
| HERO10 Black | 10 meters (33 feet) | 60 meters (196 feet) |
| HERO9 Black | 10 meters (33 feet) | 60 meters (196 feet) |
| HERO8 Black | 10 meters (33 feet) | 60 meters (196 feet) |
| HERO7 Black | 10 meters (33 feet) | 60 meters (196 feet) |
| HERO6 Black | 10 meters (33 feet) | 60 meters (196 feet) |
| HERO5 Black | 10 meters (33 feet) | 60 meters (196 feet) |
#12 LED lights
Speaking of dark and grainy-looking shots, one easy fix to that, just as above water, is to add more light.
You can do that by using external LED lights. These are fairly cheap to buy and compact so you can handle them pretty easily.
The downside is that they will only work if your subject is really close, like 1-2 feet away. If you do use them, make sure to take off the red filter otherwise, the shoots will look too reddish.
In order to mount any lights on your GoPro, you will need to buy handles for your casing. The lights will then be attached to these handles.
Modern compact LED dive lights now offer higher CRI and better battery efficiency, but effective range is still limited to 1–2 feet.

#13 Expect a narrower Field of View underwater
It’s better to be prepared for what’s in store for you underwater than be sorry later.
If you’re particular about the Field of View, then it’s good to know that the same FOV would look different above and underwater.
Due to refraction, the wide-angle views would look a lot narrower underwater.
#14 Have the Sun behind you
If you want to get the absolute best results, always shoot by turning your back to the sun.
This way the light will be on your subject, not coming directly into your lenses.
Personally, I’ve never taken any good shots when shooting into the sun, but if you think you can make something good out of it, it doesn’t hurt to give it a try.
#15 Gain better control over white balance by shooting photos in RAW
Not just in water, there are many benefits to taking pictures in RAW.
For one, you’re in a much better position to manage the white balance.
Sure, with the editing software available nowadays, you can adjust the white balance in several file formats, including JPG. But, it would be a lot easier, and you can expect better results, with RAW files.
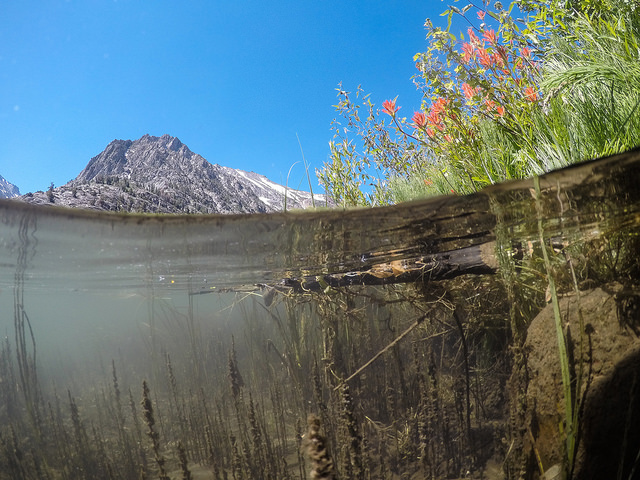
#16 Use a dome
GoPro is popular for those amazing over-under shoots – halfway underwater and halfway above the water.
If you tried to take those before you might have noticed that they look terrible when compared to what you might see other GoPro users posting. The reason for that is the waterline which sits too close to the lenses and makes them over and under scenes look so disproportionate.
The only way of taking amazing over-under shoots with your GoPro is to put in under a dome. This accessory will push the water away from the lenses which will help you capture amazing photos or videos.
#17 Prevent battery drain and use large-capacity SD cards
GoPro Battery Life – it is what it is. It’s no use crying over something you can do much about.
Even under the best circumstances, you won’t get more than 2 hours of filming time with a full charge.
If you don’t want the battery to die when you least expect it, then turn off all settings that you don’t need or require underwater.
GoPro videos take a lot of space on the SD card. Particularly, videos eat card space like crazy.
Avoid last-minute hitches by using at least 128GB or 256GB SD cards.
Despite battery improvements, cold water and high resolutions still reduce runtime significantly. Carry spare batteries and use 128GB–256GB cards minimum.
#18 Buy a floaty accessory
I think it goes without saying that unless you want your precious GoPro to die on the bottom of the ocean and become fish food, you need to get yourself something to keep it floating in case you drop it.
Even so, there are good chances that you’ll never find it again. So, don’t drop it underwater. Make sure your floaty has a good wrist strap and that it… floats.
Buying a selfie stick that is waterproof is also a good idea.
#19 Composition
Plan your shoots a little bit and use the same principles that you would use above the water.
Have a foreground and a background. Don’t shoot just the shipwreck for example. Make the shipwreck the main thing in the picture by capturing the depth of the water in the background.
This will give the viewer a sense of the space and size of the scene. GoPro cameras are so small that you can try different perspectives and get really creative with it. Put your GoPro in unusual places and experiment with a different types of shots.

#20 Camera movement
If you are filming make sure you keep the camera as steady as you can and you are making slow and smooth movements.
There’s nothing worse than watching a shaky video. It looks amateurish and it can create nausea. It doesn’t have to be perfectly still, just enough so you can use some stabilization when you edit the video to make it look better.
#21 Double handled tray for stability
A great tool for underwater shoots is the double-handled tray.
First and foremost you can swim and hold it with no problem. And secondly, you are using both hands to hold it which makes the footage so much more stable.
You can also try to keep your elbows slightly bent, instead of having them straight. It will add a plus for stability.
#22 Wash the salt off the housing
Last but not least, when you’re back from your underwater adventure please take the time to thoroughly wash your GoPro housing, if you’ve been in saltwater.
Salt will have a corrosive effect on it and it’s a pity to have it ruined when you can easily rinse it with fresh water and avoid all that.
Conclusion
Preparation is very important when it comes to shooting underwater with a GoPro.
Make sure your casing is working properly, double check your gear, and equip yourself with the right GoPro accessories for shooting underwater.
Definitely, don’t forget about the filters, and once you start shooting try to move the camera as smoothly as you can, get close enough to your subject.
Pay attention to lighting as well, this can be a major issue underwater, and always try to have a foreground and a background in your shots. This will give the viewer a sense of the space and dimensions of everything.
Despite advances in stabilization, color science, and resolution, good underwater footage still depends on preparation, lighting, filters, and smooth movement—the fundamentals remain unchanged.
Related Posts:
")


 Like A Jedi [2026 Update]")

Cristian Stanciu is a freelance video editor, owner, and post-production coordinator of Veedyou Media – a company offering video editing services to videographers, marketing agencies, video production studios, or brands all over the globe.
Just as a point of interest, a housing that’s rated to 60 meters (196 feet) is plenty good for scuba diving. Recreational divers rarely go below 100 feet, and almost never below 133 feet, so the stock GoPro housing is perfect for scuba diving. I’ve had mine on several dives, using a red filter.
That’s good to know Donald, thanks for the tip.